Friday 28 November 2014

Decor II

Next panel in the interior coming together - Monitoring station.


Will be mirrored onto the other side (rather than the expense of additional molds. I still need to detail the 'recess between the screens.

Fold up Seats and overhead cabin baggage will run down the two sides, and then I'll come up with something else at the door end.

I will add  weapon racks, general storage, ring fixing points for securing the payload. Any other ideas or suggestions?

I will have to swap to another 3D package to do the 'softer' stuff like straps and such like so they may not get done. Also I quite like the 'clean' look of the interior.

Interior Decoration

Have started to flesh out the internal decor.

The main bulkhead shown here separates the hold from the cockpit via an iris valve.


You can see a number of storage compartments, medical station and ... "gubbins". This will be resin cast and inserted into the frame.

You can also see the slightly recessed floor allowing for the longer ramp and maximising the rear door height. The opening for the rear door is now complete.

Down each side of the hull is also a "ledge". I am considering continuing the idea of internal 'panels' down each side. Just 3 mm deep these would give the sense of the internals of the ship. Seats for troops, weapon racks... that kind of thing. What do you think? I could make a small number of these which could then be mixed and matched as you wish and simply glued to the inside walls.


Thursday 27 November 2014

6mm Finished

I threw some simple digital colour at the model as I think it is easier to see the detail.

the 6mm design is now complete and the files are out at a few 3d printers for feedback, quotes and advise in things like split lines, numbers of components etc.


Now... back to the 28mm version and that annoying rear door...

6mm Dropship

Now with the hull fully detailed.

For scale, the tailplanes there are to be laser cut from 1mm styrene. Hence the square section rather than the aerofoil.


The 28mm version has a missile turret and a Radar 'dome' that are separate turrets attached with magnets. For the 6mm version these are simply too small so have been approximated and made part of the main hull cast.

Tuesday 25 November 2014

6mm DropShip

One of the things I always planned is to be able to game 6mm scale sweeping battles AND 28mm Skirmish actions as part of the same campaign. This means having the same figures in both scales.

Therefore I need a 6mm DropShip and a 28mm Scale one.

So with a bit of judicious scaling, and simplifying of a number of features that would be lost at 6mm scale, this is where I have got to so far. I have the tails to add, and a little more simple detail on the hull (a couple of vents, access hatches that kind of thing).

Overall dimensions 52 x 34 x 17

I think this will have to be cast in two pieces. The hull and engines should be cast in a single piece (though I shall have to smooth the join between engine and hull a little). The cockpit split line is not coincident with the main hull split line so I suspect it will have to be cast separately.

The tails are not shown here - but I am hoping they would be strong enough to be cast with the hull... they'd be very fiddly if cast separately.

Anyway, pictures...


Friday 21 November 2014

Dropship - Now Topless

The redesign of the main Hull is now underway

Now it can be posed Topless!


The roof is removable to allow you to get figures and vehicles inside.

Also the Main structure of the ship is simplified with flight stand connections and landing gear incorporated.


There are also holes pre-cut for wiring, and I will incorporate a lighting rig and battery compartment in the design.

The redesign has also meant that the main bay of the ship is a much simpler boxy structure, 70mm Wide, 180mm long and 45mm high

Height remains the issue and I've yet to design the rear door where the reduced bulge and the door frame itself will intrude.

Tuesday 18 November 2014

Flight Stand

A flight stand to allow the dropship to be posed in any pitch roll or yaw attitude.

 The flight stand is composed of a steel ball bearing sitting inside a good ring magnet. The magnet clamps the bearing tightly and is solid enough to support the weight of the ship, but it allows the ball to roatte in the ring, meaning the ship can be set at any roll or yaw attitude.

Pitch variation will be managed by adjusting the height of the front and back stand. This would be easier with a single magnet location on the ship, but the ship itself is quite heavy and the centre of gravity moves depending on the contents. Also the 'bulges' in the hull between the landing gear are available and 'just the right size to fit this.

For some reason the annotations on this picture have moved - sorry. I'm sure you can tell whats going on.


 The mounting is a sandwich of 1.5mm ply and 0.5mm styrene - simply because those are the materials I am laser cutting for the structure of the hull. The top plate clamps the magnet in place and is held with 4 M2 bolts through the sandwich. This in turn will be affixed to the hull structure with glued slots. I think large smears of 2 part epoxy or gorilla glue would also be beneficial - these magnets are STRONG!

The flight stand itself needs some design work. The M3 bolt shown in the steel ball will be shorter and simply bolt the ball to the top of an acrylic lasercut stand. I'm hoping to make this adjustable maybe up to as much as 300mm high to be able to pose the ship above the table top.


Monday 17 November 2014

Colouring In

It may looklike all i've done is some colouring in. But the Cockpit and Engines are now hollowed, split into castable components and are shown here with some colours just to highlight the details a little better.

If you look at the join lines for the cockpit you'll see locating lugs allowing magnets to be used to 'snap' the components together when assembling. I think this will still be manufactured as a solid resin piece for simplicity but the hollow 2mm shell means the print cost is dramatically reduced. I've also added an Iris valve to back of the cockpit for those that want to be able to model this with a detached cockpit at some point.


I think I'm trying to put off having to remodel the whole hull ... :-(

Saturday 15 November 2014

She's Breaking up ...

Having to break up the Cockpit in order to be make the pieces small enough to fit onto the bed of available 3D printers.

Just managed it with 1.5mm to spare :-D


Tuesday 11 November 2014

Payload Problem (2)

This time with slightly more accurate dimensions of the Gladius Tank.


Payload problem.

The dimensions of this dropship were set by the size of the original Listerine bottle used to form the prototype resin cast. I continued using those dimensions when I started to draw up this CAD version for laser cutting. Partly because I am teaching myself the CAD system.

In the meantime I have changed my mind regarding the likely payload for the dropship and want to be able to include almost all my Old Crow 25mm vehicles.

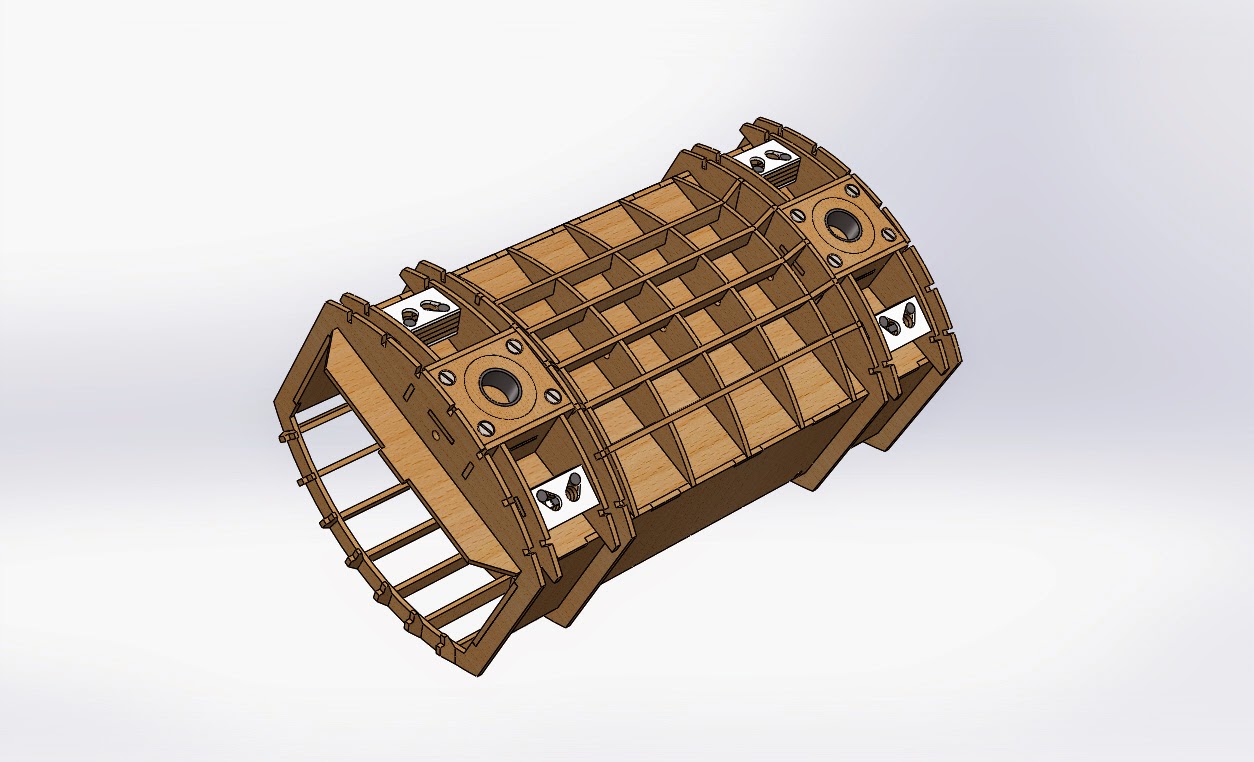
So you see that somewhat large block of 'pine' in the following picture? Well, that's a block with the maximum dimensions of the vehicles I now want to be able to transport. Its the Payload Block.

I think you might see the problem.

Oops.


It's a little on the large side when you slide the block into the payload location...

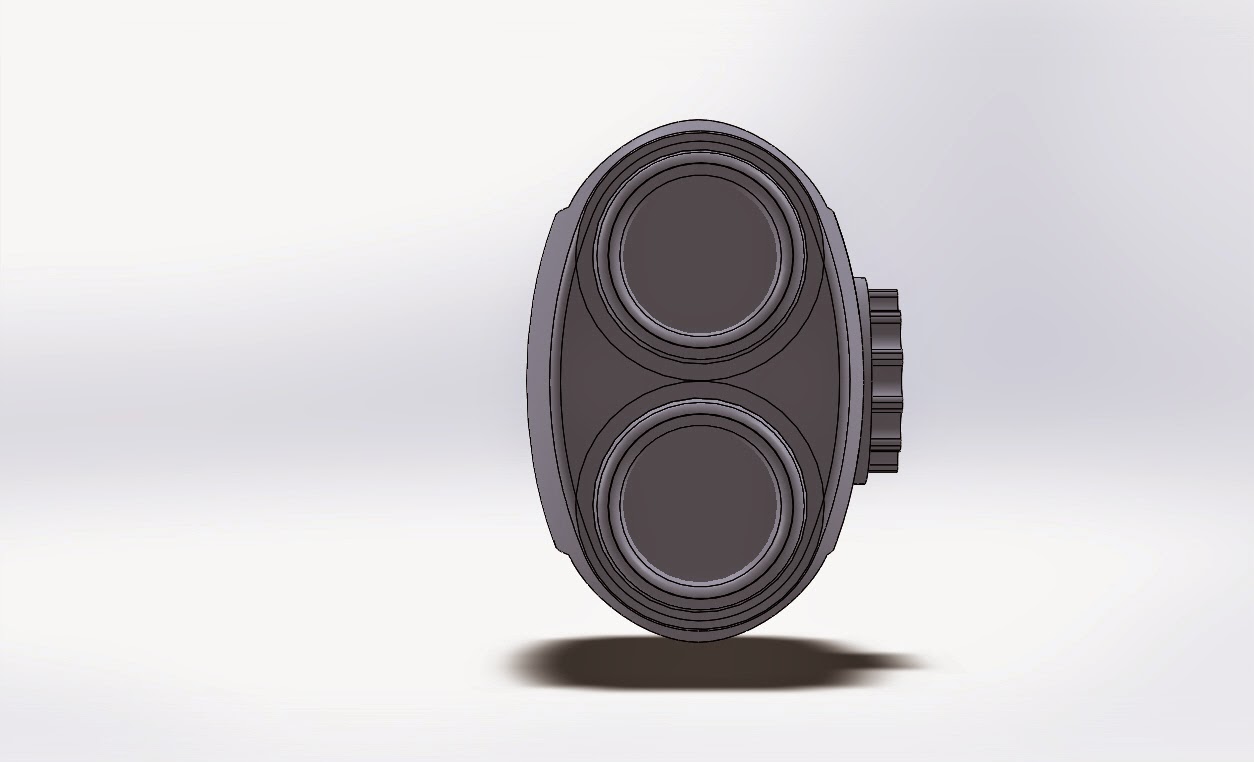
Compare the maximum dimensions to the relatively small rear door...

So I have some work to do.

Bear in mind I still need to be able to get a full length ramp in under the existing floor, which in itself will mean that I have a few mm less headroom than shown here.

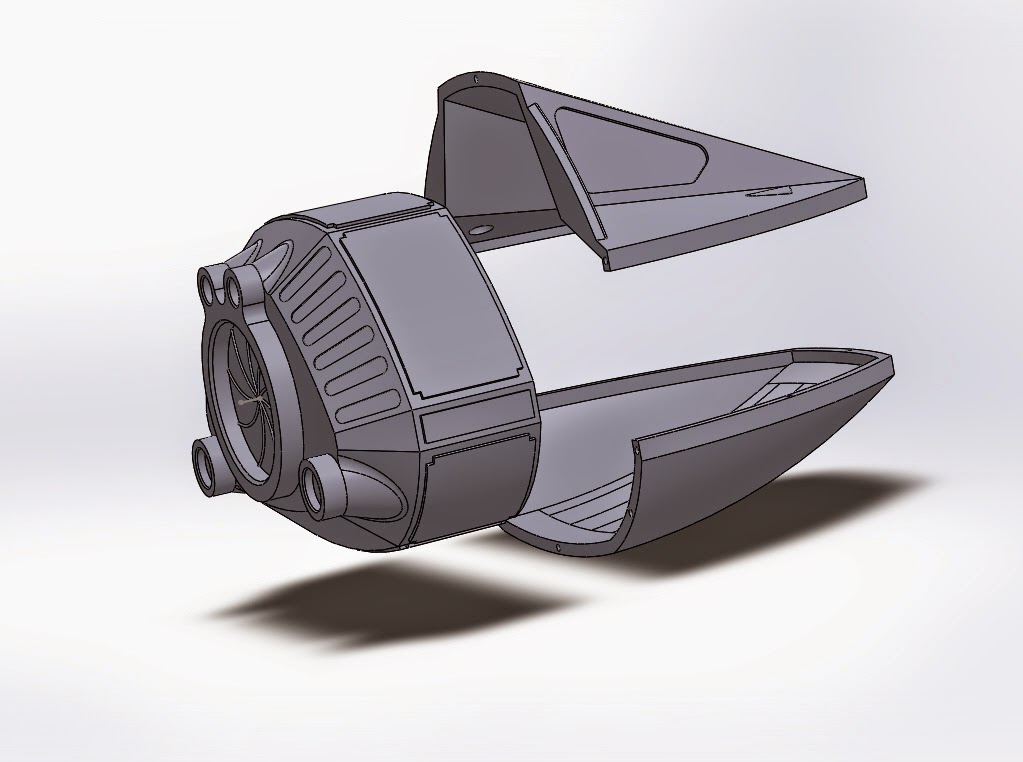
I sketched up a simple block shape to stretch the hull around the Payload Block and I dislike it. It makes the whole ship look far to 'dumpy', the main hull becomes almost cylindrical.

So, I am doing to play around with a few options.

  1. Deepening the main hull around 10mm. This might mean retaining the same width and length or enlarging them in proportion.
  2. Lowering the rear hinge a few mm
  3. Reducing the rear chamfer on the hull shape so that the rear Door Matches the Mid section ribs. Currently the front and back chamfers on the hull are 10mm from the hull bulges, and the mid section is only 5mm.
  4. redraw the payload block so it more accurately resembles the models the ship will carry. (for example the tallest vehicle is the Gladius Medium Tank. This tank is much taller in the middle than it is at the edges, so the Cuboid Block isn't a great representation of the sapce actually taken up by the tank.
I MAY press ahead with this current version and get it made, as this could handle some of the vehicles such as the Goanna and Gecko scout cars and trucks (unlaiden). This could be a command/light version of the drop ship. A further 'Heavy' variant  could then have an enlarged hull with the same cockpit, landing gear, engines and tailfins making the whole thing modular.

Decisions, decisions.


Monday 10 November 2014

Now with forward engine 'Shoulders'


 Shoulders on the front engine prevent them from exhausting directly into the rear engine intakes.

Friday 7 November 2014

Posing the Engines

And just to show the engines locate properly at other angles.


And If you see it arriving from this angle, you're about to be flattened!


Tail Fin


 I cant put it off anymore - I really am going to have to redo the hull.


Engine Details Added